
The Ultimate Guide to Building Your Own Solar Panel Cooker
Cook for Free Using Only Sunlight: How to Build a Solar Panel Cooker
How to build a solar panel cooker is simpler than most people expect — and it costs almost nothing to get started.
Here is a quick overview of the core steps:
- Cut cardboard panels into flat reflective surfaces (typically 4-6 panels)
- Cover each panel with aluminum foil, smoothing it tightly to avoid wrinkles
- Arrange the panels in a fan or star shape around a central cooking area
- Place a dark-colored pot or cooking bag at the center focal point
- Angle the panels to bounce sunlight directly onto the pot
- Preheat for 20-30 minutes, then add your food and let the sun do the work
That’s the core of it. No electricity. No gas. No complicated tools.
Solar cooking has been used for decades around the world — from backyards to campsites to off-grid homes. A panel cooker is the most portable and beginner-friendly of all solar cooker types. Unlike a box cooker, it has no enclosed chamber to build. Unlike a box cooker, it has no enclosed chamber to build. Unlike a parabolic cooker, it requires no precise curved shaping.
You just need cardboard, foil, and sunlight.
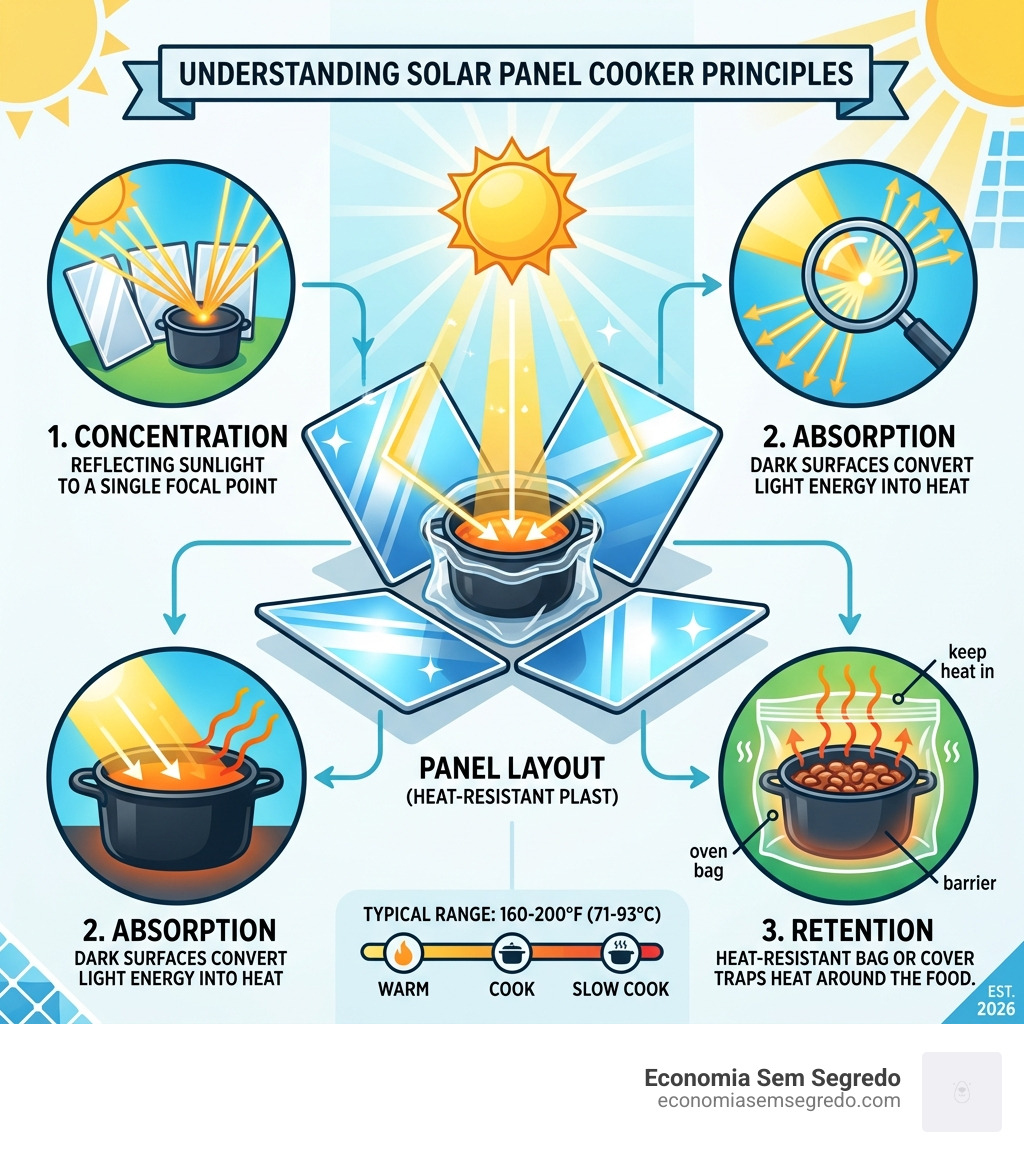
The science behind it comes down to three ideas: concentration (reflecting sunlight onto one spot), absorption (using dark surfaces to turn light into heat), and retention (keeping that heat around your food long enough to cook it).
In ideal conditions, a simple solar cooker can reach 160-200°F (71-93°C) — enough to melt, warm, slow-cook, and even pasteurize.
For anyone looking to cut energy costs and try a genuinely useful DIY project, this is one of the most rewarding places to start.
Understanding the Solar Panel Cooker vs. Other Designs
When we dive into solar thermal energy, we quickly realize that not all cookers are created equal. If you are researching how to build a solar panel cooker, you might have come across box or parabolic designs. Each has its own strengths, but for the average DIY enthusiast in April 2026, the panel cooker often wins on simplicity and cost.
A panel cooker is essentially a hybrid. It uses large reflective surfaces (panels) to concentrate sunlight onto a pot, but unlike a box cooker, the pot itself is usually placed inside a high-heat plastic “oven bag” to retain heat. This makes it incredibly lightweight and foldable.
| Feature | Panel Cooker | Box Cooker | Parabolic Cooker |
|---|---|---|---|
| Construction Difficulty | Low (Beginner) | Moderate | High |
| Portability | Excellent (Folds flat) | Bulky | Low (Large/Heavy) |
| Cooking Speed | Moderate | Slow (Slow-cooker style) | Fast (Like a stovetop) |
| Max Temperature | 200°F – 250°F | 200°F – 300°F | 500°F+ |
| Cost | Very Low | Low to Moderate | Moderate to High |
According to How Do You Make An Effective Solar Cooker? A Complete Guide, the panel cooker is the “gateway drug” to solar cooking. It’s perfect for those of us who want to experiment with sustainable living without spending a fortune on specialized equipment. While a box cooker is better at retaining heat in windy conditions, the panel cooker’s ability to be stored in a flat-pack makes it the ultimate choice for campers or those with limited storage.
Essential Materials and Tools for Your DIY Project
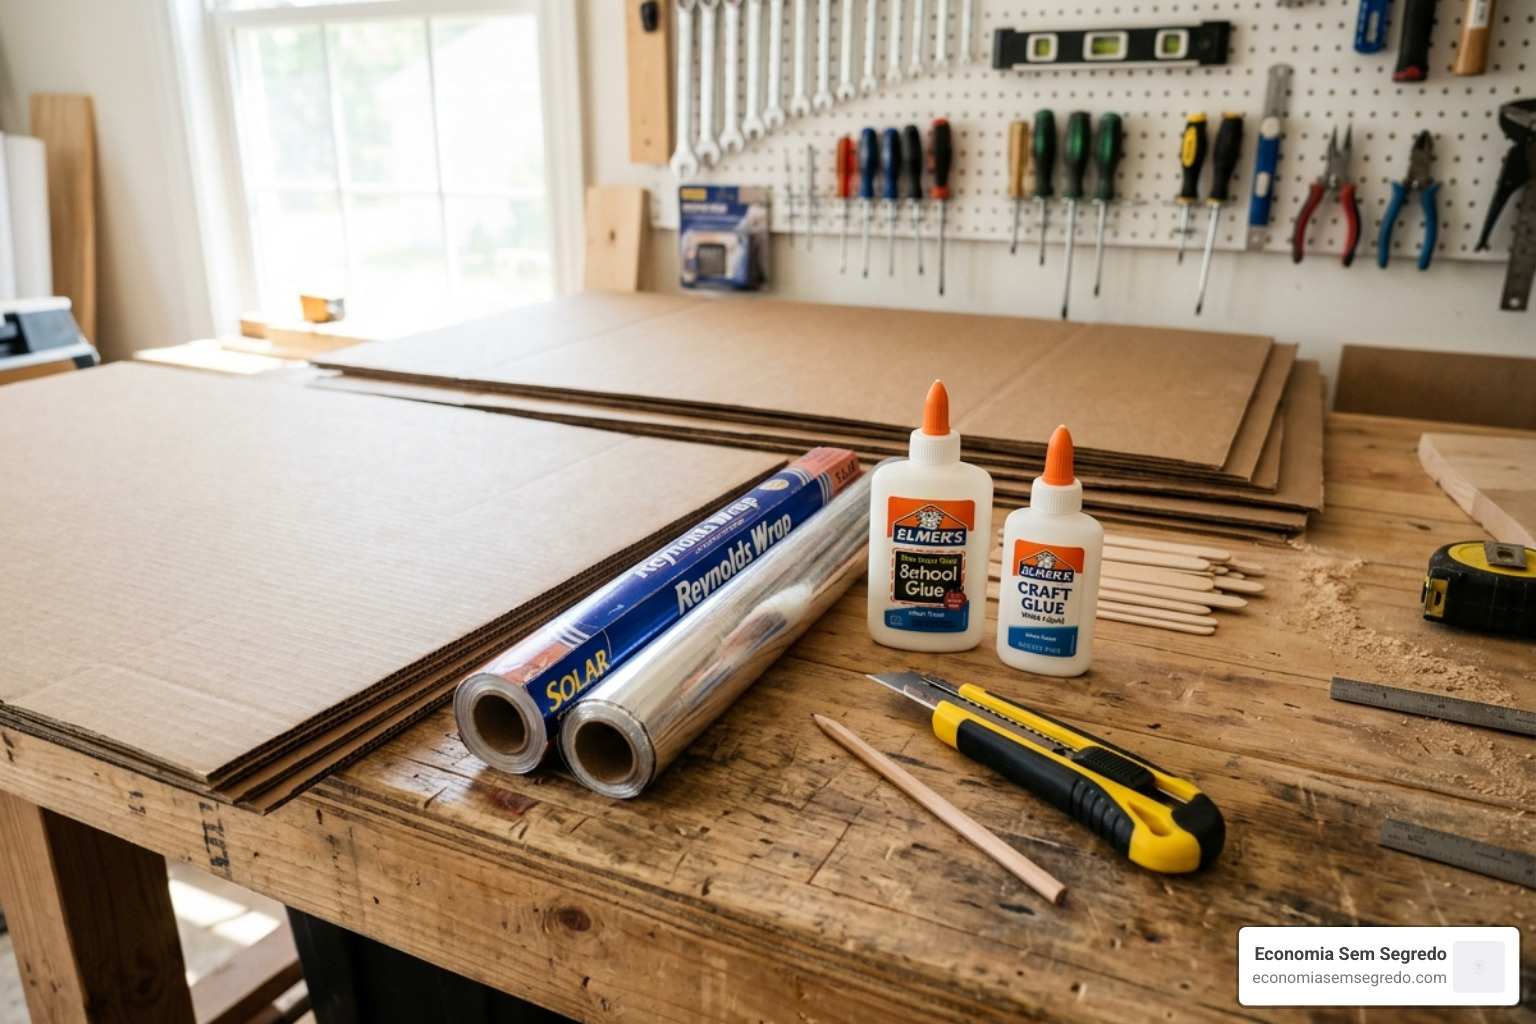
Before we start cutting, let’s gather our supplies. Most of these items are likely sitting in your recycling bin or kitchen pantry right now. At Economia Sem Segredo, we love projects that turn “trash” into functional tools—it’s the ultimate form of money management!
The Shopping List (Total Cost: Nearly $0)
- Corrugated Cardboard: Large boxes are best. We want sturdy cardboard that can stand up against a light breeze. A large pizza box can work for a small model, but 24″ x 24″ sheets are better for a full-sized cooker.
- Aluminum Foil or Reflective Mylar: This is your “engine.” Heavy-duty foil is preferred as it tears less easily.
- Non-Toxic Glue: White school glue or a glue stick works well. Avoid toxic adhesives that might off-gas when they get warm.
- Utility Knife or Box Cutter: For clean, precise cuts.
- Straight Edge or Ruler: To ensure your panels are symmetrical.
- Dark-Colored Pot: A thin-walled, matte black pot is the gold standard. Dark colors absorb the sun’s rays, while shiny metal reflects them away.
- Oven-Safe Cooking Bags: These are crucial for the “retention” part of the science. They trap a layer of hot air around the pot, creating a mini-greenhouse effect.
Step-by-Step Instructions on How to Build a Solar Panel Cooker
Building this device is a fantastic weekend project. If you have kids, it’s a brilliant way to teach them about renewable energy. Following the logic found in How to Make and Use a Solar Oven: Easy DIY Guide, we will focus on a multi-panel design that maximizes the focal point.
Preparing Reflective Panels for Your Solar Panel Cooker
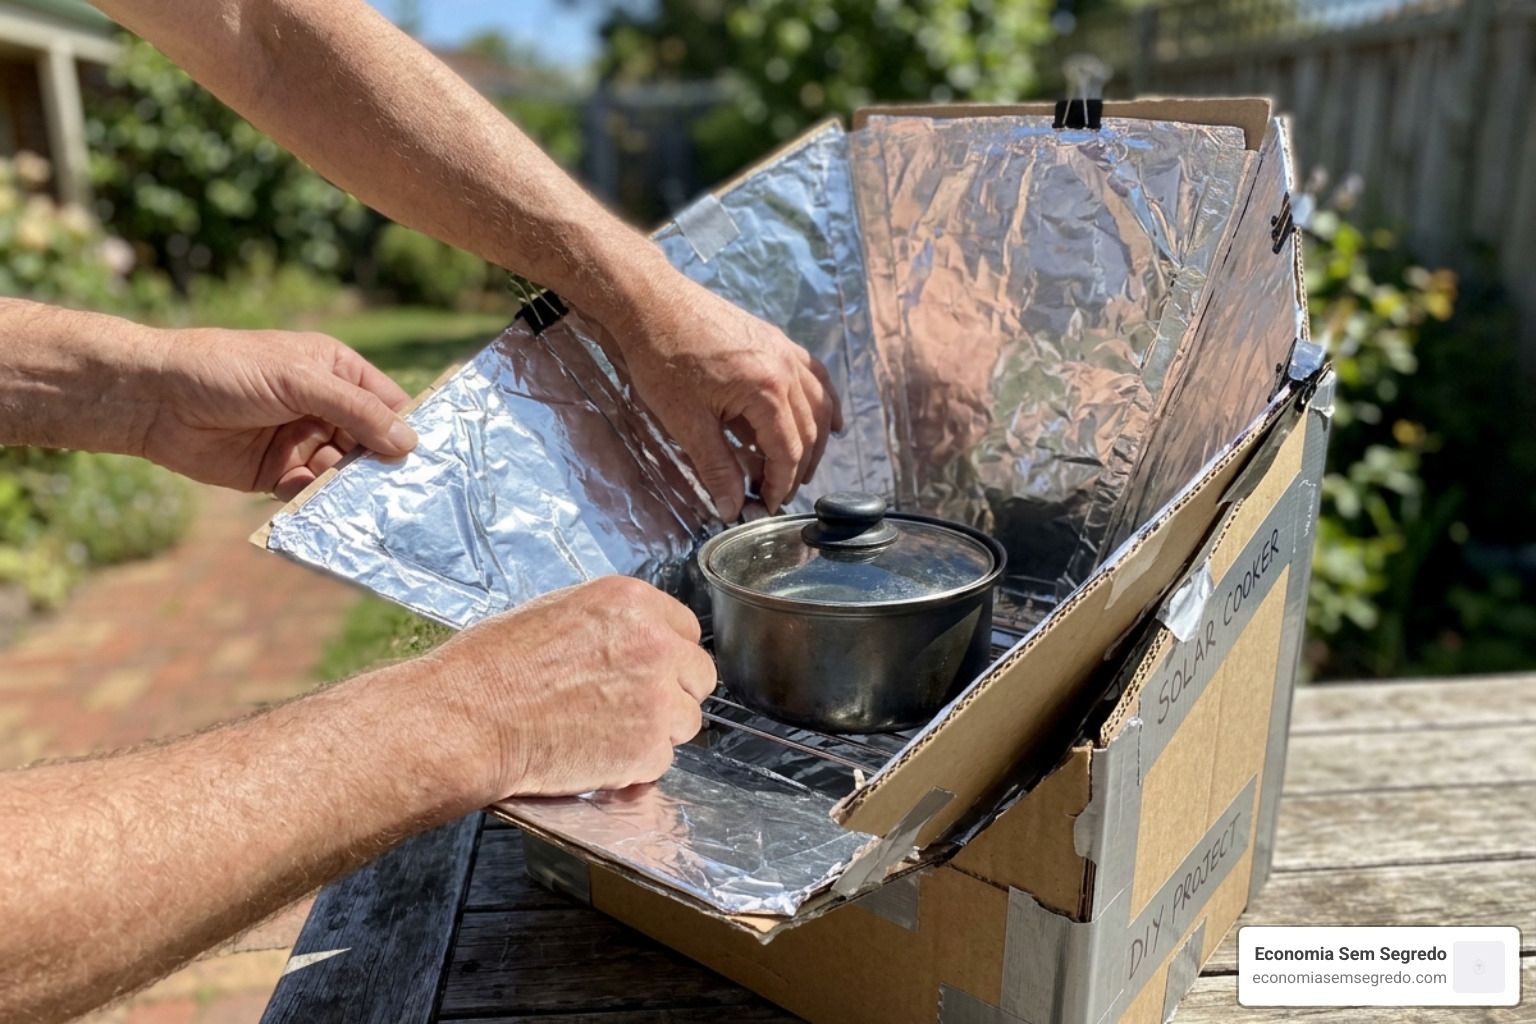
The efficiency of your cooker depends entirely on how well you prepare the reflective surfaces. If the foil is wrinkled, the light scatters in different directions. We want it as smooth as a mirror.
- Cut Your Panels: Cut your cardboard into four or six large trapezoidal shapes. A common design is a large central square (the base) with four panels extending outward like petals.
- Apply Adhesive: Spread a thin, even layer of glue over the cardboard. If using liquid glue, we recommend using a paintbrush to ensure there are no “clumps.”
- Smooth the Foil: Lay the aluminum foil onto the glue, shiny side up. Use a soft cloth or a squeegee to gently push out air bubbles. Start from the center and move toward the edges.
- Trim the Edges: Fold any excess foil over the back of the cardboard and tape it down. This prevents the edges from peeling over time.
Positioning and Supporting the Panels for Maximum Sunlight
Once your panels are shiny and dry, it’s time to give them structure.
- Create the “V” Shape: Angle your panels so they form a bowl or a funnel shape. The goal is to have all reflected light hit the exact spot where your pot will sit.
- Stability in the Wind: Because cardboard is light, a gust of wind can turn your cooker into a kite. Use wooden skewers, binder clips, or even small stones at the base to keep the panels at the correct angle.
- Sun Tracking: The sun moves! You will need to re-aim your cooker every 30 to 60 minutes to keep the focal point centered on the pot.
Operating Your Cooker for Efficiency and Safety
Now for the fun part: cooking! But safety first. Just because there’s no fire doesn’t mean you can’t get burned.
The Preheating Phase
Never put food into a cold solar cooker. Set your cooker out in the direct sun for at least 20-30 minutes before adding your pot. This allows the air inside the cooking bag and the pot itself to reach a baseline temperature. In April 2026, with the sun at a moderate angle, this preheating is essential to bridge the gap between “warming” and “cooking.”
Food Safety and the “Danger Zone”
In the food world, the “Bacterial Danger Zone” is between 40°F and 140°F. Bacteria love this temperature range. To be safe:
- Use a Thermometer: Always use a meat thermometer. Poultry must reach an internal temperature of 165°F (74°C).
- Avoid Frozen Food: Always thaw meat completely before putting it in a solar cooker. Solar heat is “low and slow,” and it takes too long to thaw and then cook frozen meat safely.
- Eye Protection: Those reflective panels are bright. Avoid looking directly at the focal point, and consider wearing sunglasses while adjusting the panels.
Best Foods for Solar Cooking and Estimated Times
Solar panel cookers are essentially “solar slow cookers.” They are perfect for dishes that benefit from gentle heat.
- S’mores (20-30 mins): The classic beginner test. If it melts chocolate, your cooker works!
- Grains (1.5-3 hours): Rice, quinoa, and couscous come out fluffy and never burnt.
- Root Vegetables (2-4 hours): Sliced potatoes and carrots become incredibly sweet as their natural sugars caramelize slowly.
- Slow-Cooked Stews (3-5 hours): Since it’s hard to burn food in a solar cooker, stews can simmer all afternoon.
Weather Workarounds: If a cloud passes by, don’t panic. A well-insulated pot inside a cooking bag can hold its temperature for 15-20 minutes of cloud cover. However, if the sky is overcast, it’s best to move the meal to your indoor stove.
Frequently Asked Questions about Solar Cookers
What are the most common mistakes beginners make?
The most frequent error we see is using shiny or reflective cookware. If you use a stainless steel pot, it will bounce the sun’s energy away! Always use matte black. Another mistake is “peeking.” Every time you open the cooking bag to check the food, you lose about 10-15 minutes worth of accumulated heat. Trust the process!
How does weather affect performance in April 2026?
April can be tricky. While the sun is getting stronger, the ambient air temperature might still be cool. Wind is your biggest enemy in the spring because it “steals” heat from the panels and the pot. If it’s a windy day, try to find a sheltered spot (like behind a glass sliding door or a brick wall) that still receives full, direct sunlight.
Can I upgrade this design for higher efficiency?
Absolutely. Once you’ve mastered the cardboard and foil version, you can look into an Insulated Solar Electric Cooker (ISEC). As detailed in How to Build a Solar Powered Electric Oven, these advanced designs use a small 100W solar panel to power a heating element inside a highly insulated chamber. This allows you to cook even when it’s slightly cloudy or even keep food warm after the sun goes down by using thermal mass (like bricks or tiles) to store heat.
Conclusion
At Economia Sem Segredo, we believe that financial education isn’t just about stocks and bonds—it’s about finding creative ways to reduce your daily expenses and live more sustainably. Learning how to build a solar panel cooker is a perfect example of this philosophy. You are taking free energy from the sky and using a few recycled materials to provide a hot meal for your family.
Whether you’re preparing for an off-grid adventure or just want to lower your utility bill during the sunny months of 2026, solar cooking is a skill that pays dividends. It encourages patience, a connection with nature, and a deeper understanding of the resources we often take for granted.
Ready to take the next step in your journey toward energy independence? Start your journey toward sustainable savings today and discover how simple shifts in your lifestyle can lead to massive financial freedom. Happy cooking!
